Run riscv on qemu
Contents
This blog is about the whole procedure of running riscv on qemu. It also records some pitfalls I encountered.
Preparation
If you ever downloaded source code from GitHub, you must have experienced the desperation that the download speed is only 50kb/s. Moreover, downloads are interrupted from time to time due to network problems.
So, you need git proxy to solve this problem. Please refer to my last blog(最终发现没啥用…)
Possible problem
When I git clone riscv-gnu-toolchain from GitHub, it was often stuck while receiving objects.(usually 99%…)
Someone says that ‘VMware running on NAT has this problem. Changing it to Bridged will fix the issue.’[1]
However, the same problem appeared on my host machine. Finally, I failed to fix this issue.
There are two possible solutions:
- Wait until it continues.
- Interrupt and download again.
The first one doesn’t make sense for me and the second one is to try your luck…
I have tried to download it again and again but fail.
Finally, I asked a senior studying in Japan to help me clone it and send it to me.

Prerequisites
1 | sudo apt-get install autoconf automake autotools-dev curl python3 libmpc-dev libmpfr-dev libgmp-dev gawk build-essential bison flex texinfo gperf libtool patchutils bc zlib1g-dev libexpat-dev git |
To make sure you have git on your system before the next step. Other standard packages are needed to build the toolchain.
1 | cd ~/my-riscv |
Because there are many submodules in this repository, so we need to add --recursive to fetch the submodules automatically.
Installation(Newlib)
Make
Pick an install path by using --prefix
1 | ./configure --prefix=/home/clickmouse/my-riscv/opt/riscv |
You will get riscv-64-unknown-elf-gcc and its cousins in opt/riscv. The c runtime library is Newlib.
Specfication
Newlib is a runtime c standard library.
A runtime library (RTL) is a set of low-level routines used by a compiler to invoke some of the behaviors of a runtime environment, by inserting calls to the runtime library into compiled executable binary.[2]
A runtime library is needed by any c program. Functions such as _read(), _write(), _getpid() and so on are implemented in runtime library.
Test
1 | $ ./riscv64-unknown-elf-gcc -v |
You will get a lot of information about riscv64-unknown-elf-gcc.
Some useful information is listed below.
1 | --target=riscv64-unknown-elf-gcc #tool is riscv64-unknown-elf-gcc |
Installation(Linux)
Pick an install path by using --prefix
1 | ./configure --prefix=/home/clickmous/my-riscv/opt/riscv-linux |
You will get riscv-64-unknown-linux-gcc and its cousins. The c runtime library is glibc.
Installation(Others)
Please refer to riscv各种版本gcc工具链编译与安装[3]
RISC-V QEMU
Make
current directory: riscv-gnu-toolchain
1 | cd qemu |
If Errors are like this
1 | install -d -m 0755 "/usr/local/share/qemu" |
Please run sudo make install
You can test by running following commands
1 | $ qemu-system-riscv64 -version |
Specification
The RISC-V QEMU port supports the following targets:[4]
- riscv32-softmmu (RV32 full-system emulator)
- riscv64-softmmu (RV64 full-system emulator)
- riscv32-linux-user (RV32 linux user-mode emulator)
- riscv64-linux-user (RV64 linux user-mode emulator)
Tips: In this step, you may need to install some libraries. You can find related library package name you need use
sudo apt-cache search package-nameand then usesudo apt install package-name. For example, if you type sudo apt-cache search gcc, then you will get a series of packages with a string of gcc in its name.[5]
Linux source code
Download
It is not an essential step if you have Linux source code on your system.
To finish the whole procedure of running riscv on qemu, I downloaded a new copy of Linux source code.
1 | wget http://ftp.sjtu.edu.cn/sites/ftp.kernel.org/pub/linux/kernel/v5.x/linux-5.5.tar.xz |
If you want to download it to specific directory, please add -P dir after wget.
The second step is to decompress the source code.
1 | xz -dkv linux-5.5.tar.xz #d:decompression. k:keep the Compressed file. v:show the procedure |
It may consume some time and don’t forget to add -v. Or you can only use top to know it is running(hhh).
Make(do this after building Busybear)
1 | cd linux |
Busybear
Prerequisites
riscv-64-unknown-linux-gcc
Make
Run this command to get the source code of busybear
1 | git clone https://github.com/michaeljclark/busybear-linux |
By the way, you can use this command to download riscv-pk which is needed next part in busybear-linux directory
1 | git clone --recurisve https://github.com/michaeljclark/busybear-linux |
If you don’t want busybear to download linux source code here, you need to modify the shell file.
1 | cd scripts |
You can delete all lines about downloading, extracting and building linux. If you are not clear how to delete, please replace your build.sh with build.sh in Appendix of this blog.
Compile them and prepare a root filesystem image named busybear.bin
1 | cd busybear-linuxx |
Tips: It will cost much time. But don’t use make -j4 or make -j$(nproc) because build.sh will download something from Internet. Use multi-processor will probably result into connection error.
Specification
busybear-linux is a RISC-V Linux root filesystem image that targets the virt machine in riscv-qemu.[6]
riscv-pk
Make
Get the source code of riscv-pk
1 | git clone https://github.com/riscv/riscv-pk |
Build BBL
Currently, you are in riscv-pk. And riscv-gnu-toolchain is added to $PATH
1 | mkdir build && cd build |
Specification
We only need bbl. So, make install is not necessary.
bbl is a supervisor execution environment for tethered RISC-V systems.(I haven’t figure it out yet)
Run[7]
Run this command
1 | qemu-system-riscv64 -nographic -machine virt \ |
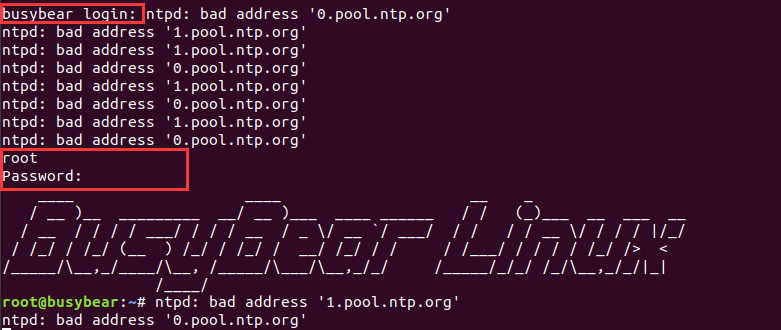
username: root
password: busybear
If you want to shutdown QEMU. There are two methods.
ctrl+A+Xbut it doesn’t work on my system.ps aux|grep qemufind thepidofqemu-riscv64.kill pid
Debug[8]
Run this command
1 | qemu-system-riscv64 -nographic -machine virt \ |
Open qemu and wait for gdb to attach
Open another terminal and run this command
1 | riscv64-unknown-linux-gnu-gdb ~/build_kernel/linux5.5/vmlinux |
Acknowledgement
Chao Liang helps me download the source code of riscv-gnu-toolchain.
Reference
[1] stuck while receiving objects
[2] Runtime library
[3] Risc-V QEMU
[5] Download essential library
[6] busybear-linux
[8] how to debug
Appendix
1 |
|
Author: clickmouse
Link: https://clickmouse.github.io/run-riscv-on-qemu/
License: 知识共享署名-非商业性使用 4.0 国际许可协议